Carol R. Eaton Designs

Carol R. Eaton Designs

FABRIC FOR SALE: click on pages below!

Friday, May 23, 2014

Typography Fabric for The Printed Fabric Bee!

Lisa Chin is this month's Queen of The Printed Fabric Bee! Lisa chose typography as her choice and the "hive" has been very busy interpreting Lisa's vision. I had a few ideas and ended up being drawn to a more whimsical approach. 
I watch the antics of small song birds daily outside my office window. Sometimes they seem to have a lot to say to each other and this is my impression of their conversations.
I started by painting and sun printing cotton.

Next I used some sweet little bird thermofax screens designed by Terri Stegmiller.

The text was another thermofax screen that Terri custom made for me - she is an awesome artist if you need screens or stencils!
Click here for her Etsy shop.

Here is Lisa's finished piece... and now you know what birds say!
Lisa will be announcing details for the drawing soon on her blog and The Printed Fabric Bee blog. Please hop over for posts from the other artists on how they created their custom fabric for Lisa's typography vision! 

Thursday, May 22, 2014

Thermofax Screen + Ice Dyeing!

I finished the covered bridge piece. I'm going to create a series of prints using the bridge titled the "Wedding Series" . I know it's not the most dramatic title but it describes it accurately

I showed a few photos in yesterdays post on how I started the design. Below is a recap for you:
Terri Stegmiller made the thermofax screen from Hannah's wedding invitation design.

I applied fabric paint from Speedball.

I continued the design across the surface of the fabric. I let the paint cure for about 12 hours and then heat set using a dry iron. 

The final step was to ice dye the fabric. The goal was to use summer colors to represent the area where Hannah and Connor will be married. 

Wednesday, May 21, 2014

New Thermofax Screen - Yippee!

My very talented and soon to be daughter-in-law created hand stamped wedding invitations! There is a covered bridge on the property where she and Connor will be married and Hannah carved it on a stamp... I told you she was talented! 

I thought it would be fun to ask artist Terri Stegmiller to turn Hannah's design into a thermofax screen, (please check Terri's Etsy shop). The screens arrived this week and I couldn't wait for Hannah to try it out... just a little demo with a big project the next time they visit! 


I plan to ice dye the fabric with garden colors... to be continued! 

I tried the screen on some burlap - It was unusual but fun! 

Tuesday, May 20, 2014

A Quiet Piece!

I'm delighted to be working outside again! It's still a little windy but the warm weather is here to stay as we transition from spring to summer in New England.


This piece was created by misting and then scrunching cotton. I hit the tops of the fabric peaks with paint and then dropped painted randomly across the surface of the fabric. Once I pressed it I thought it need a little more color in the background so I dyed it with ivory... just enough to calm down the bright white of the original fabric.

Typically I would add another surface technique for more vivid colors but there was something appealing about this calm and quiet piece!
What are your quiet colors?

Sunday, May 11, 2014

Combining Techniques = Dye, Fabric Paint & Ice Cubes!

I started with a lovely piece of cotton dyed Robin's Egg blue. 

I misted the fabric and then painted purple across the surface.
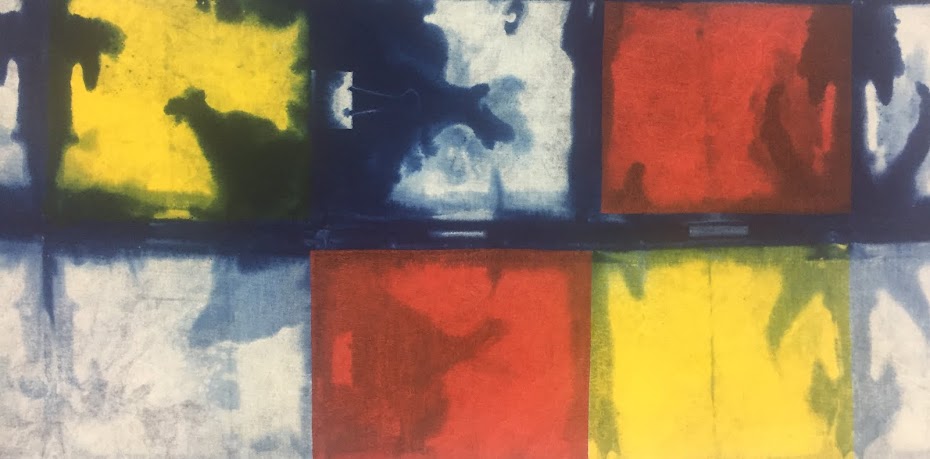
I scrunched the fabric and placed ice cubes randomly in the folds. I added a small amount of salt to help create even more texture. 
Here you can see how the melting ice cube pushes the fabric paint around. 
Shortly after the fabric was all set to melt in the sun the clouds rolled in and it started to drizzle. I should have remembered to check the forecast! 
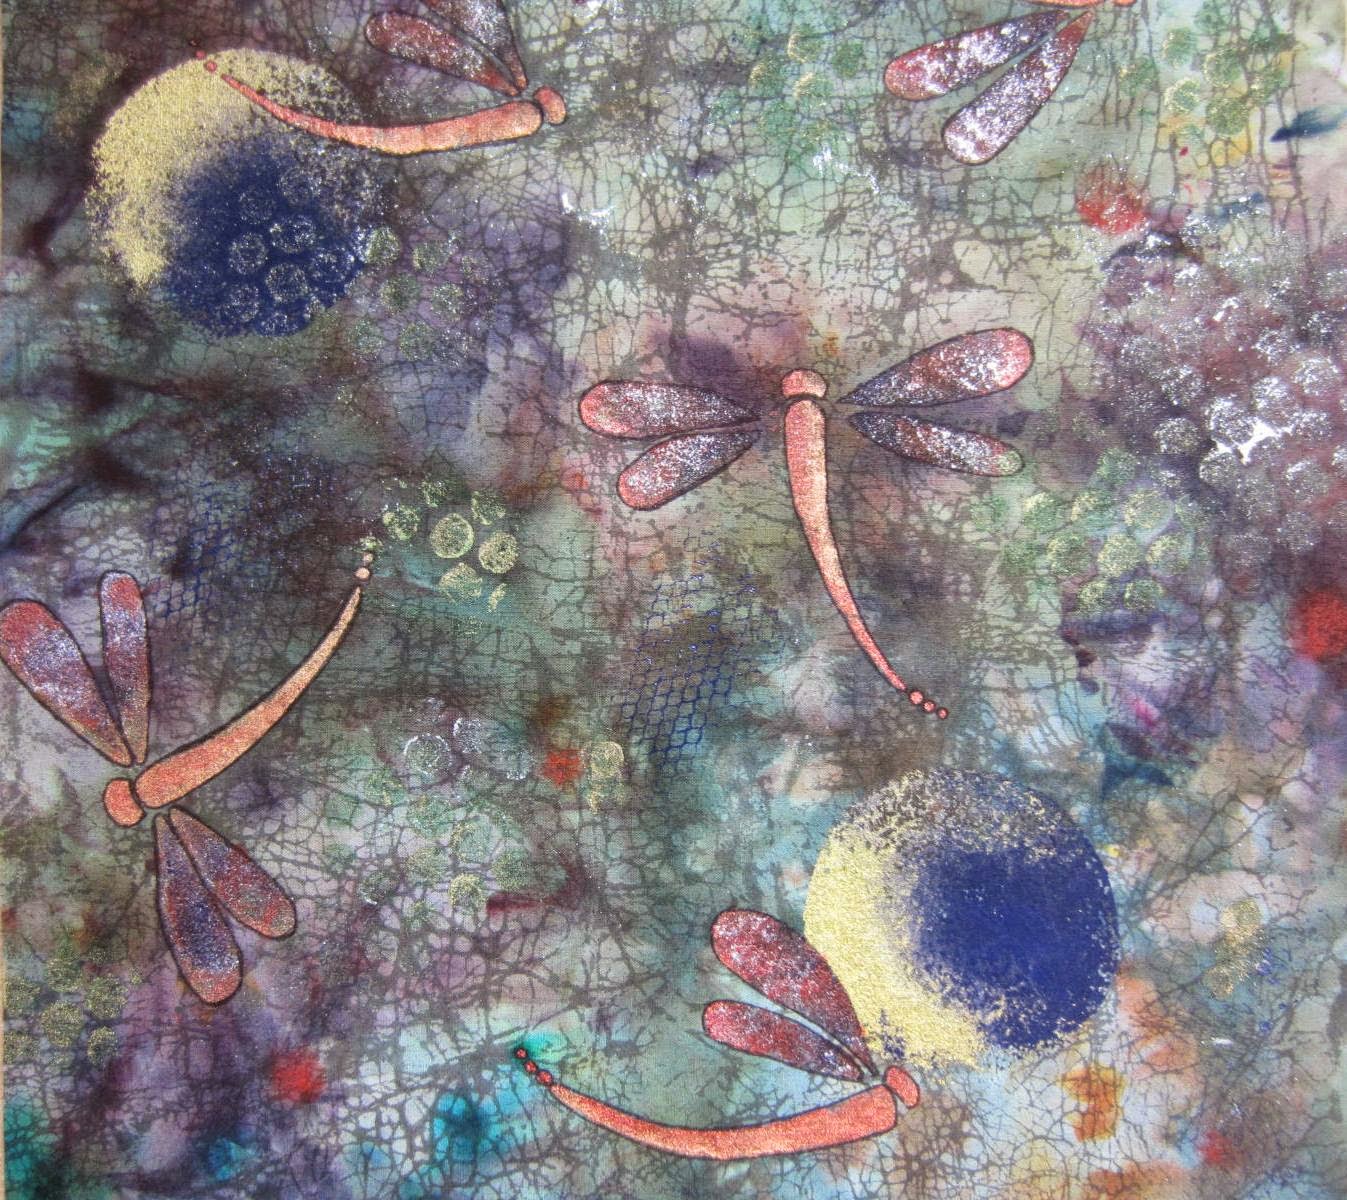
It eventually dried! Because the ice melts slowly (even when its not raining!) the fabric paint has time to move around and pool up forming unique patterns. 
The fabric has a 2D look with the paint feathering out in delicate patterns. 
Give it a try and let me know how you make out! 

Monday, May 5, 2014

SAQA Conference Debrief!

This was the first SAQA conference I've attended and it exceeded my expectations! The presenters were relevant, the networking was priceless and the two local exhibitions I saw were inspirational; "Tarnish" in Rockville and "Radical Elements" in Silver Springs, MD are highly recommended. 

The conference gave me an opportunity to offer my fabrics to a national audience and the ability to meet other artists to swap ideas and network - just fabulous. I can now put a face to names I've seen on websites and social media over the years and feel more connected to the creative arts community. I would be remiss if I didn't mention how wonderful it was to reconnect with artists I already knew - it was fun to spend uninterrupted time with them!


I can't wait for artists to send photos of the creations they made from my fabrics! 

Thank you to Diane Write and Mary Lachman for helping me transport
and manage my inventory! 

It always feels like we eat and drink more than usual at these events - yippee!
Lower left: Mary Lachman, Roxane Lessa, Diane Cadrain, Carol Vinick,
Rita Hannifin, Lesley Riley and Christine Adams

The Printed Fabric Bee babes!
Lesley Riley, Julie B. Booth & Me

We are off to explore and view the exhibition!
Morna McEver/Keynote Speaker, Mary Lachman/Best Buddy Extraordinaire, Christine Adams/Co-Curator for the Tarnish exhibit, Me and Lesley Riley/Presenter, Co-Curator for the Tarnish exhibit & Printed Fabric Bee member


Art Nouveau = This Month's Printed Fabric Bee Give-Away!


Jackie Lams is this month's "Queen" and her theme choice was Art Nouveau! I love the rich jewel tones that come to mind with I think of that era. I chose to apply those elements to one of my favorite subjects - dragonfly's. 
I had a jewel toned piece of cotton that I had ice dyed. I applied a layer of flour resist which I spread across the surface with a silk screen tool. It doesn't look like much right now but just wait!
Once the flour dried I crinkled and scrunched the fabric to create cracks in the resist. Next I applied fabric paint with a sponge brush. The sponge brush allows me to ensure the paint finds it's way onto the fabric below. 
I allowed the paint to dry a full 24 hours and then heat set. To remove the flour I soaked the fabric in a bucket of soapy water to take off as much as I could before tossing into the washer. I followed Julie B. Booth's instructions for flour resist from her blog. Julie has a book coming out in the fall that will detail all kinds of wonderful techniques! Be sure to click on her site for updates.

The next design element needed was to add purple and gold circles. I'm not sure why I chose circles - it was more of a feel and circles seemed to be the best shape to apply the color. 

Then the dragonfly's were stenciled. I used luminescent paints to keep that art nouveau vibe.
The next 2 photos are before and after using a black sharpie marker to outline the dragonfly's. You can see how the black makes them pop off the fabric.... good 'ole markers! 

To balance out the design I stamped a few found objects, (onion netting and bubble wrap). Here is Jackie's finished piece. For your chance to win a 6" X 6" fabric collection please hop over to Jackie's blog and leave a comment - the winner will be announced May 17th!