I measured out one yard pieces of PDF cotton and soaked them in warm water. I selected some dyes and was ready to ring out the fabric when I spied some whiffle balls. I wondered how tying the whiffle balls into the fabric would alter the way the dyes meandered and blended.... I had to give it a try!
 |
| Tying the whiffle balls in the fabric using rubber bands |
 |
| I placed a couple of small bowls under the fabric so the entire piece didn't completely sit in the pool of dye as the snow melted |
 |
| I'm about to put the snow on top of the fabric |
 |
| Here is the line up of fabric covered in snow all ready for the dye |
 |
| I sprinkled dye directly on top of the snow. Many people mix the dye with water and pour on top of the snow but I find the dyes come out brighter when using dry dye powder. |
 |
| The snow is melting and the lovely colors are peeking through... it's hard to wait! |
 |
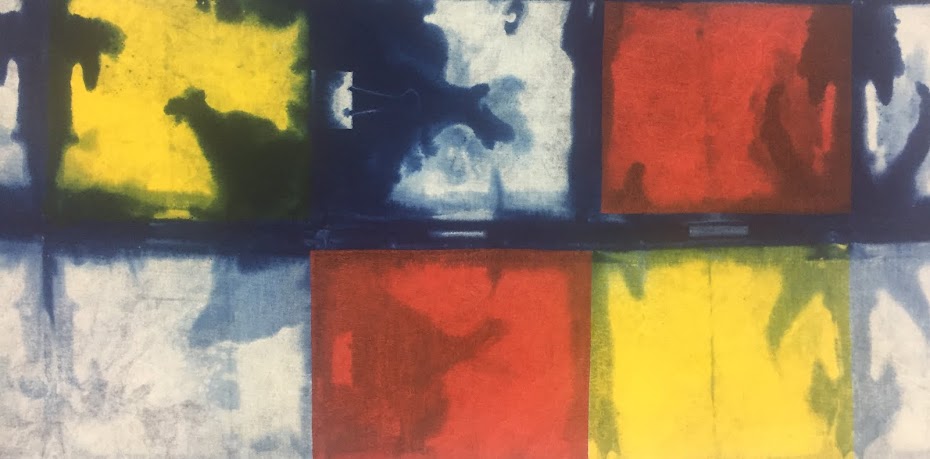
| The finished piece is bright and fun! |
 |
| The color explosions are unexpected! |
 |
| I'm not sure if it reminds me of underwater or outer space... |
terrific!
ReplyDeletethanks!
DeleteOh my gosh, what a great experiment with the whiffle balls. Love these results!!!
ReplyDeleteWhiffle balls were created by a fellow here in my home town so they seem to be everywhere! It was fun using them for dyeing and I'll be collecting more for future projects.
DeleteGreat idea! Now I just need to figure out 1) what a whiffle ball is, and 2) where to get them!
ReplyDeletethe colors are fantastic! do you remember what colors you used?
ReplyDeleteThanks! I think I used citrus yellow, ultra violet and raspberry. Let me know if you give it a try - I'd love to see your results!
DeleteCheers!
Thanks Carol~ if it comes out, I for sure will post a picture!
ReplyDeleteOk Carol ~ we tried this with the balls, twice and they didn't come out looking like yours at all! How did you get it to where the colors are so light on the top? and so bright/dark on the edges??? Is there a trick to doing this???? Are you putting a lot of dye? Is this liquid dye?? We used it dry. Thanks for any help.
ReplyDeleteOhhhh… twice? Shoot… let’s see what the difference in our approach might be. Did you use whiffle balls rather than solid balls? Whiffle balls have slits in them which in this case allows the dye to run into the ball. If you use a solid ball the dye will still run off the balls due to their shape but there will be less diversity in the way the colors blend and migrate.
DeleteMaybe it’s the way I arrange the fabric/balls in the container? I believe for this piece I elevated some of the balls in the center of the fabric by putting an upside down disposable bowl under fabric. I didn’t want all the fabric to sit in the melted dye overnight. I’m ok with some of the fabric sitting in the “mud” but not all of it. I also made sure to keep the balls in an upright position under the snow. This alone should allow the dye to run down the balls creating more diverse colors in the circles.
I don’t bury the fabric/balls with a ton of snow; I use just enough snow to cover the highest peak. I sprinkle with dry dye powder and wait.
Please feel free to email me some photos of your process. I’d be happy to take a peek to see if there is anything I can add that you haven’t tried already.
Keep the creativity going!
ReplyDeleteThank You VERY much! my sister-in-law will bring her fabric over tomorrow and i will take a picture of it and email it to you. I'm thinking it might be the balls, they are not whiffle balls, but they are similar, their holes are not as big.
Again Thank You so much!